Overview
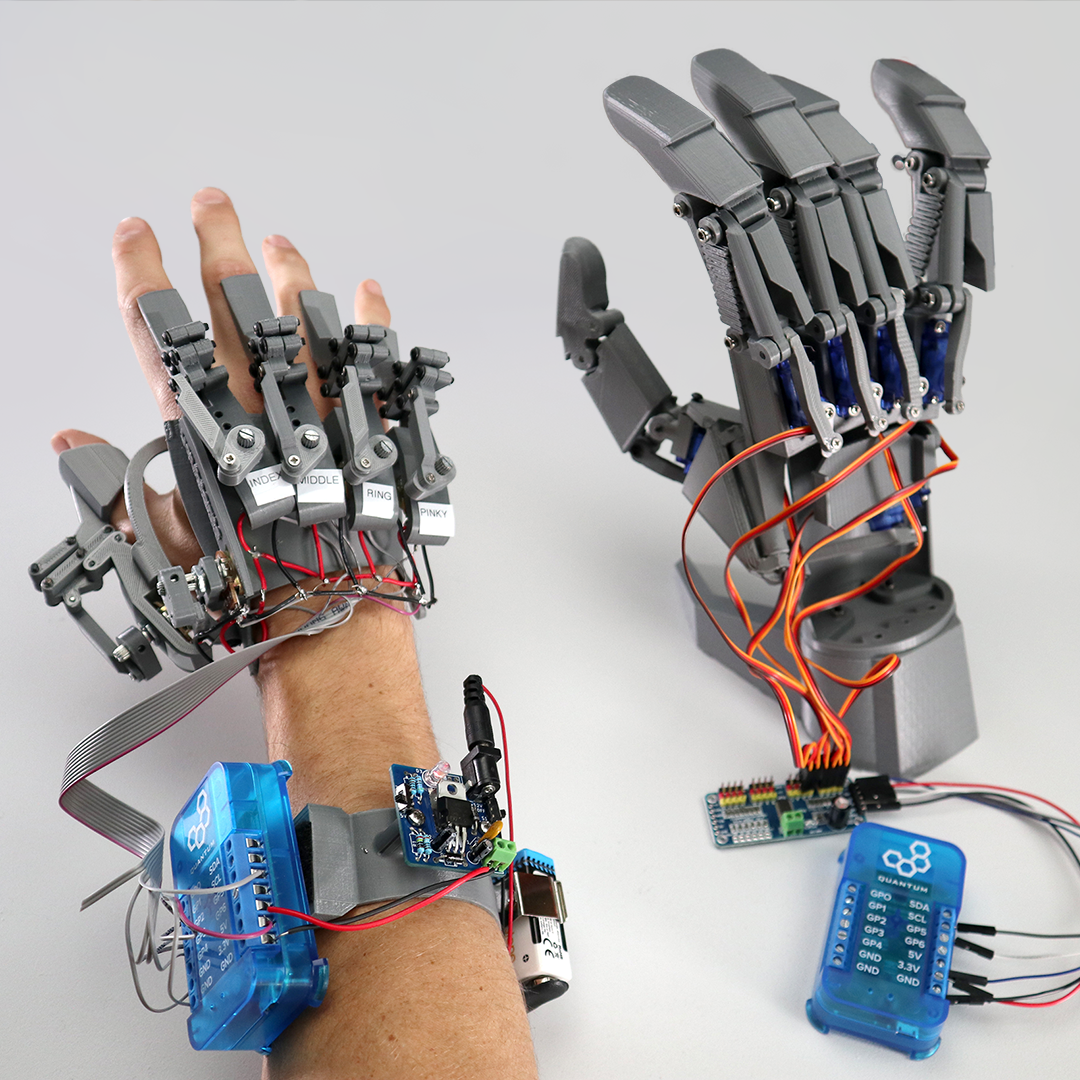
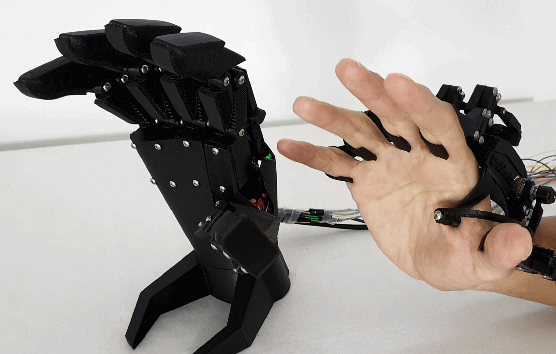
The Robot and Wearable Exo Hands are two projects that implement 3D printing, servos, potentiometers, and Manual ranging code objects. The Exo Hand is a wearable glove that allows you to control the movements of the Robot Hand.
| $374 |
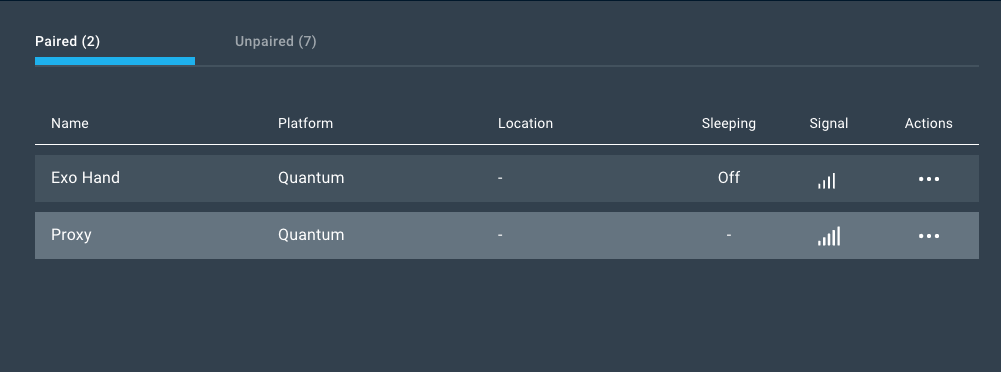
| 2 Clients |
Things used in this project
Hardware components
Picture | Name | Quantity | Price(As of 12/10/20) | Link |
|---|---|---|---|---|
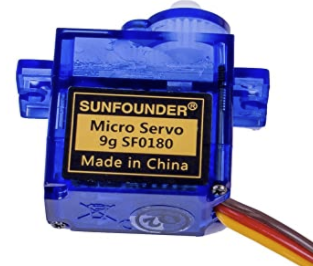 | 9G servo (works with some soap dispensers with weak springs) | 6$3.66/servo | Included in Starter Kit Or you can purchase it here | |
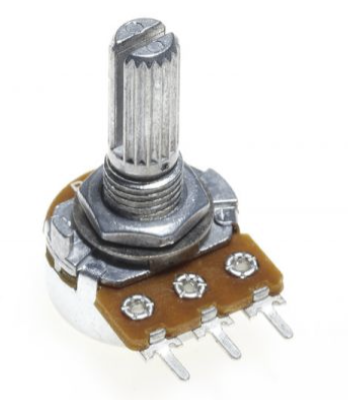 | 10K Potentiometer | 6 | ~$.70/Potentiometer | Can be purchased here |
 | Robot Hand and Exo Hand .stl Files | 1$359 | Can be purchased here | |
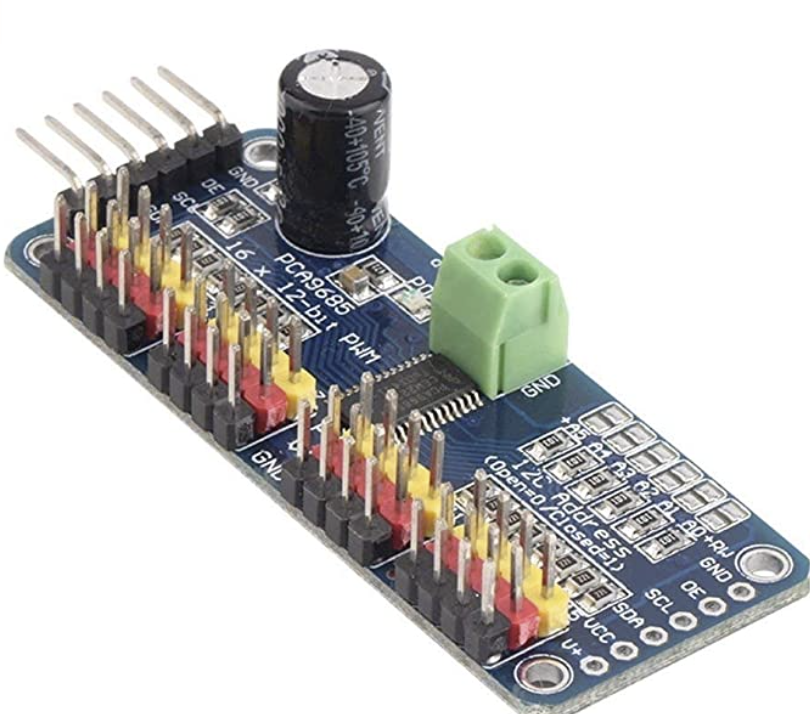 | PCA9685 | 1 | ~$5/servo | Included in Starter Kit Or you can purchase it here |
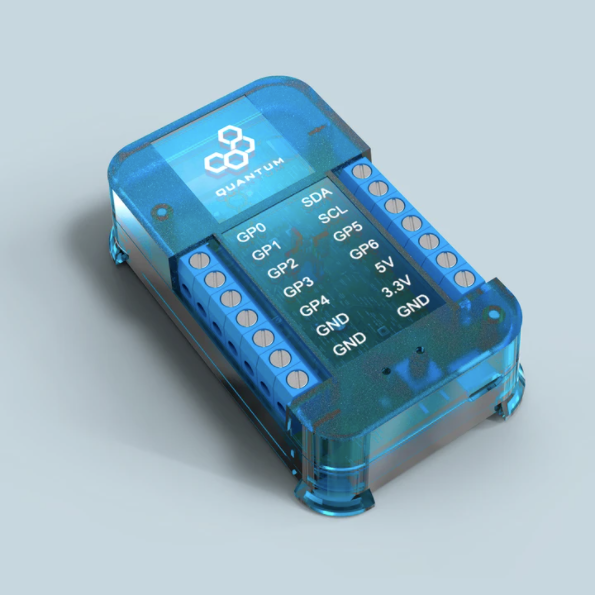 | Q-Client Builder Base | 2 | $49 |
Tools Used
Picture | Name | Quantity | Price | Link |
|---|---|---|---|---|
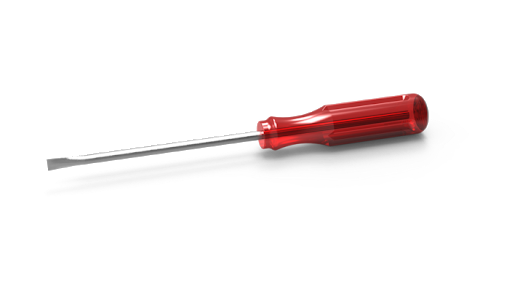
| Small flat-head screwdriver | 1 | ~$8.74 | Included in Starter Kit Or you can pick one from our Recommended Tools List |
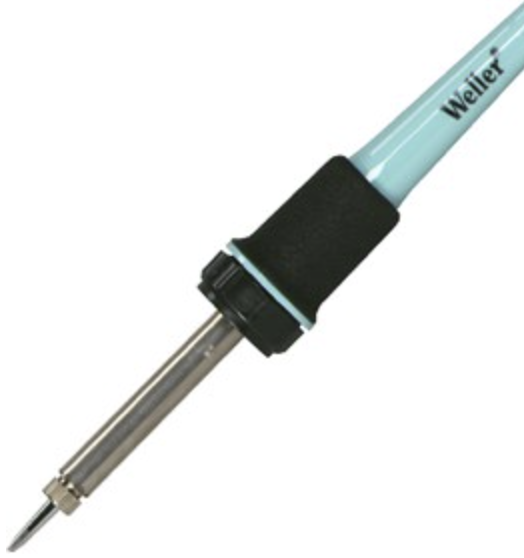 | Soldering Iron | 1- | You can pick from one on our Recommended Tools List |
Build Process
Video
| Widget Connector | ||||||||||
|---|---|---|---|---|---|---|---|---|---|---|
|
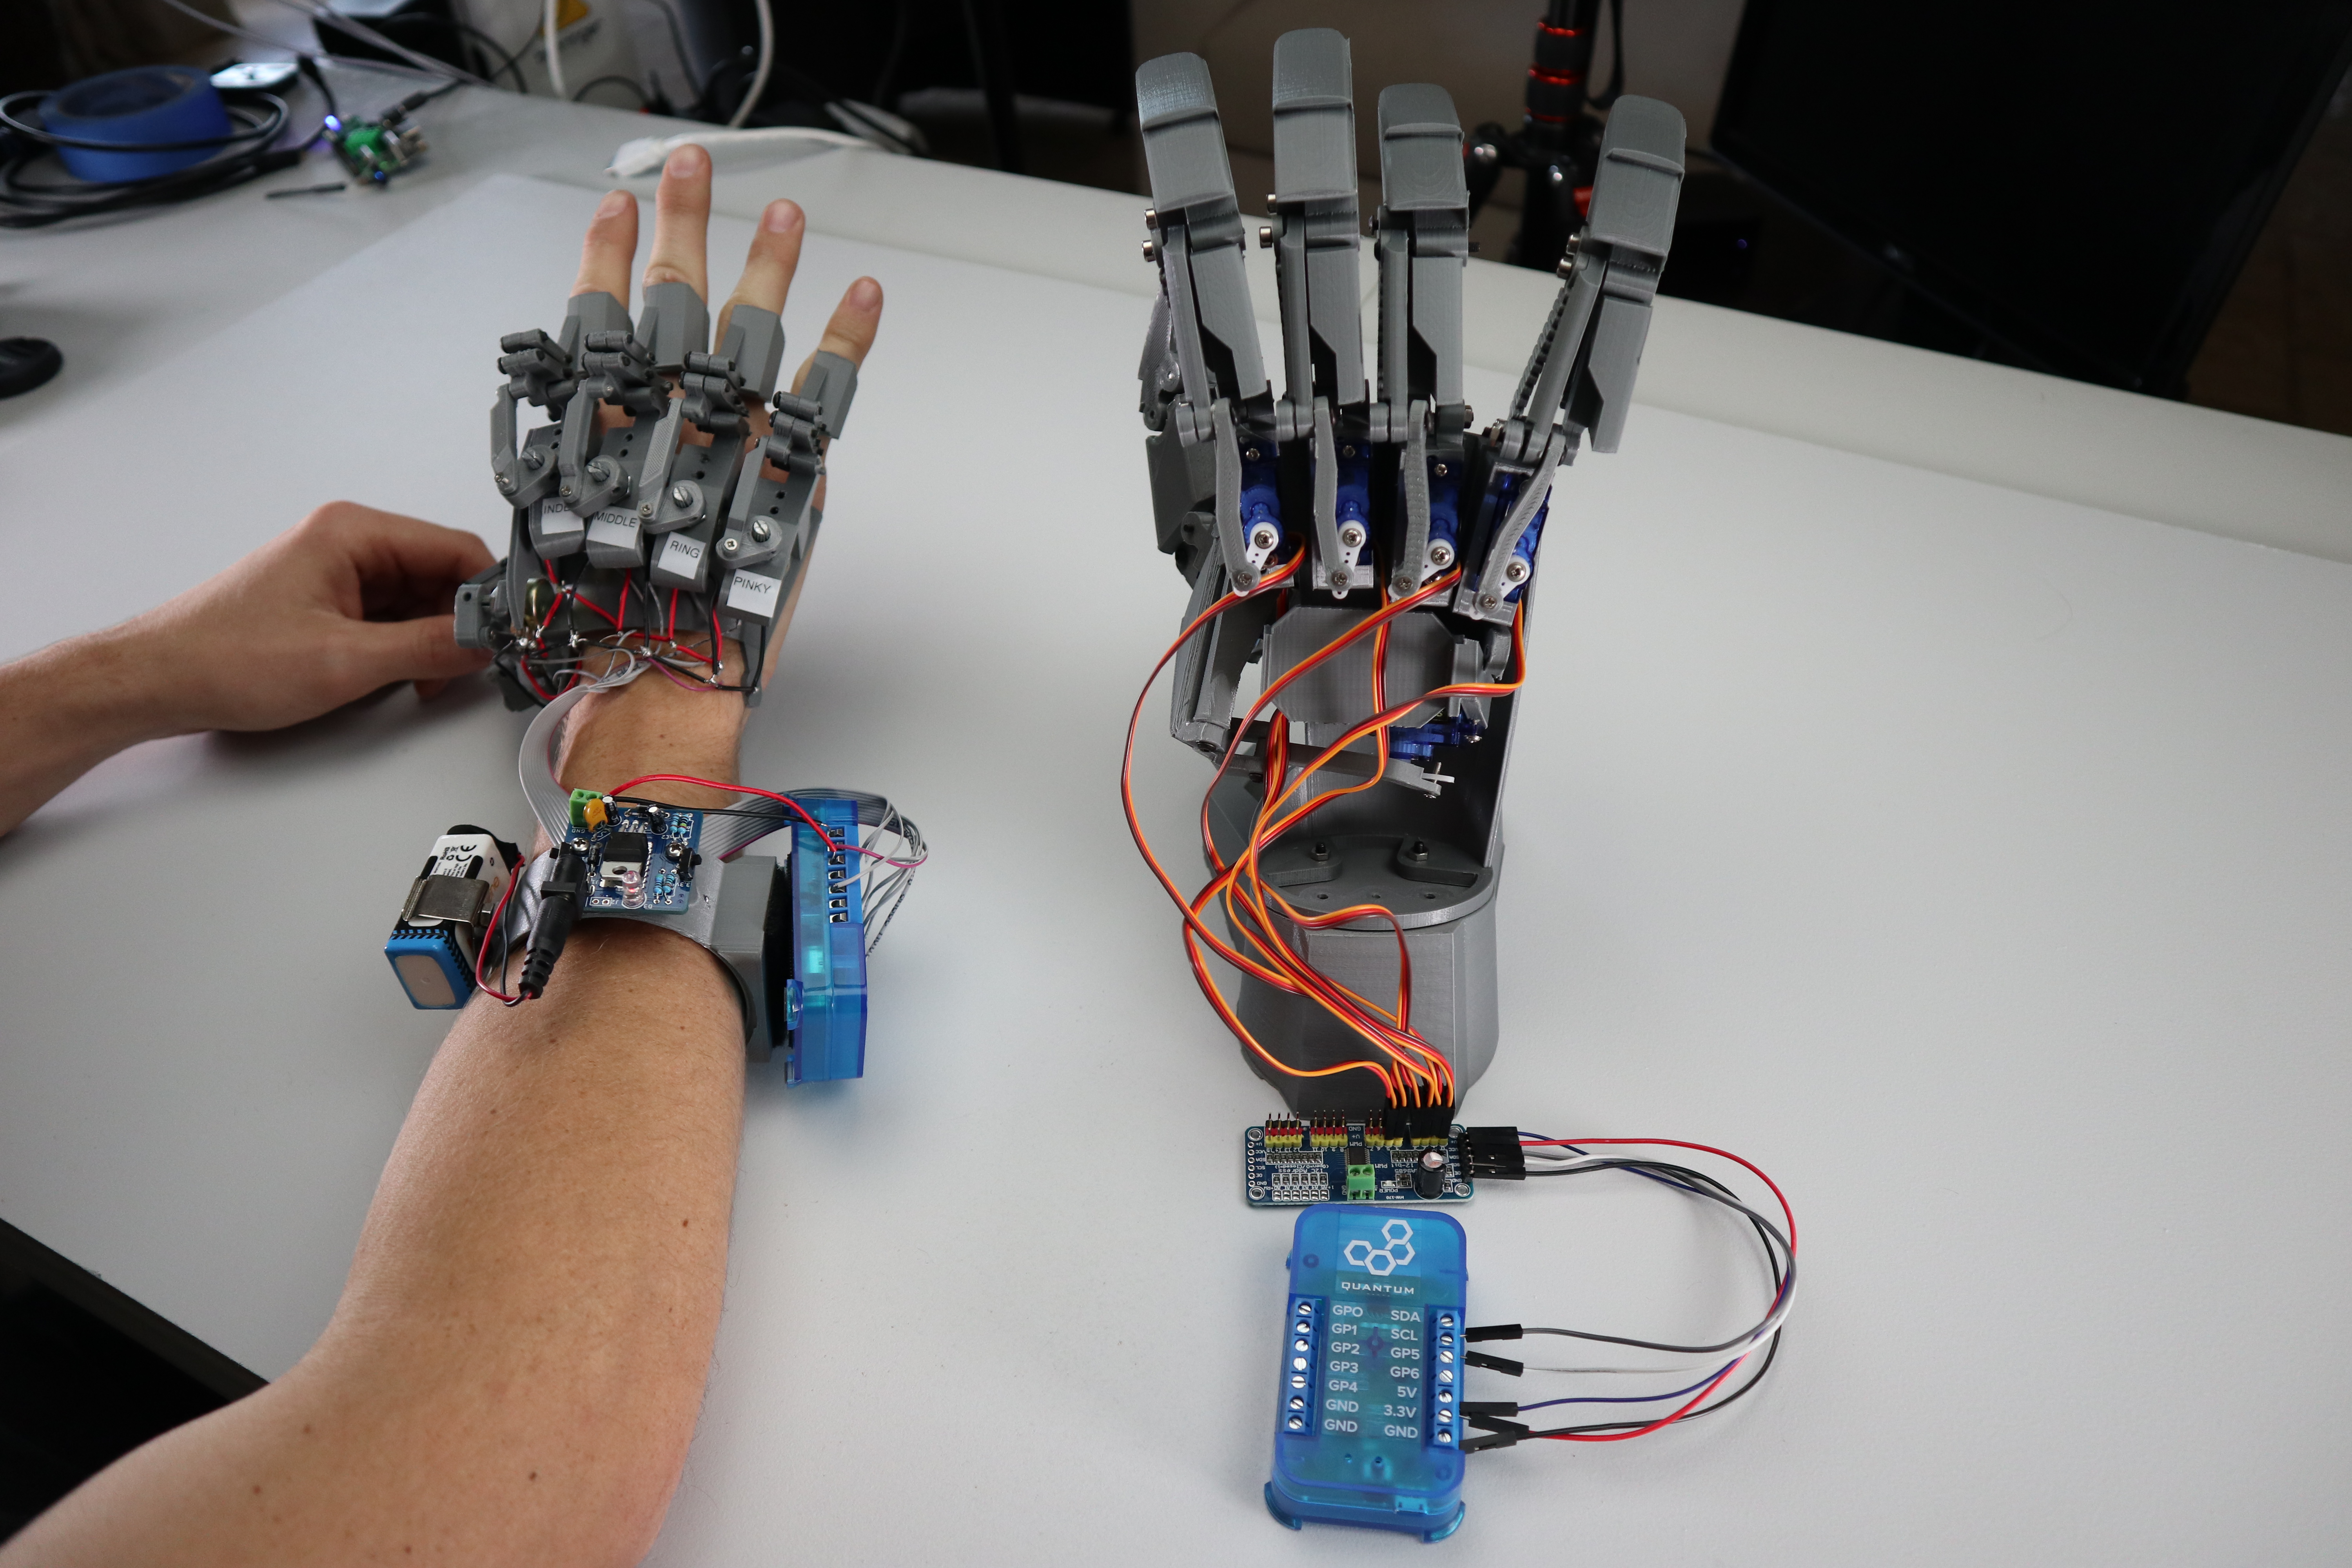
Step 1: Gather and Assemble the Hardware Components
Gather all hardware components listed above and follow the Ubionic Robot Hand and Exo Hand manuals to assemble the components.
Robot Hand Manual:
| View file | ||
|---|---|---|
|
Exo Hand Manual:
| View file | ||
|---|---|---|
|
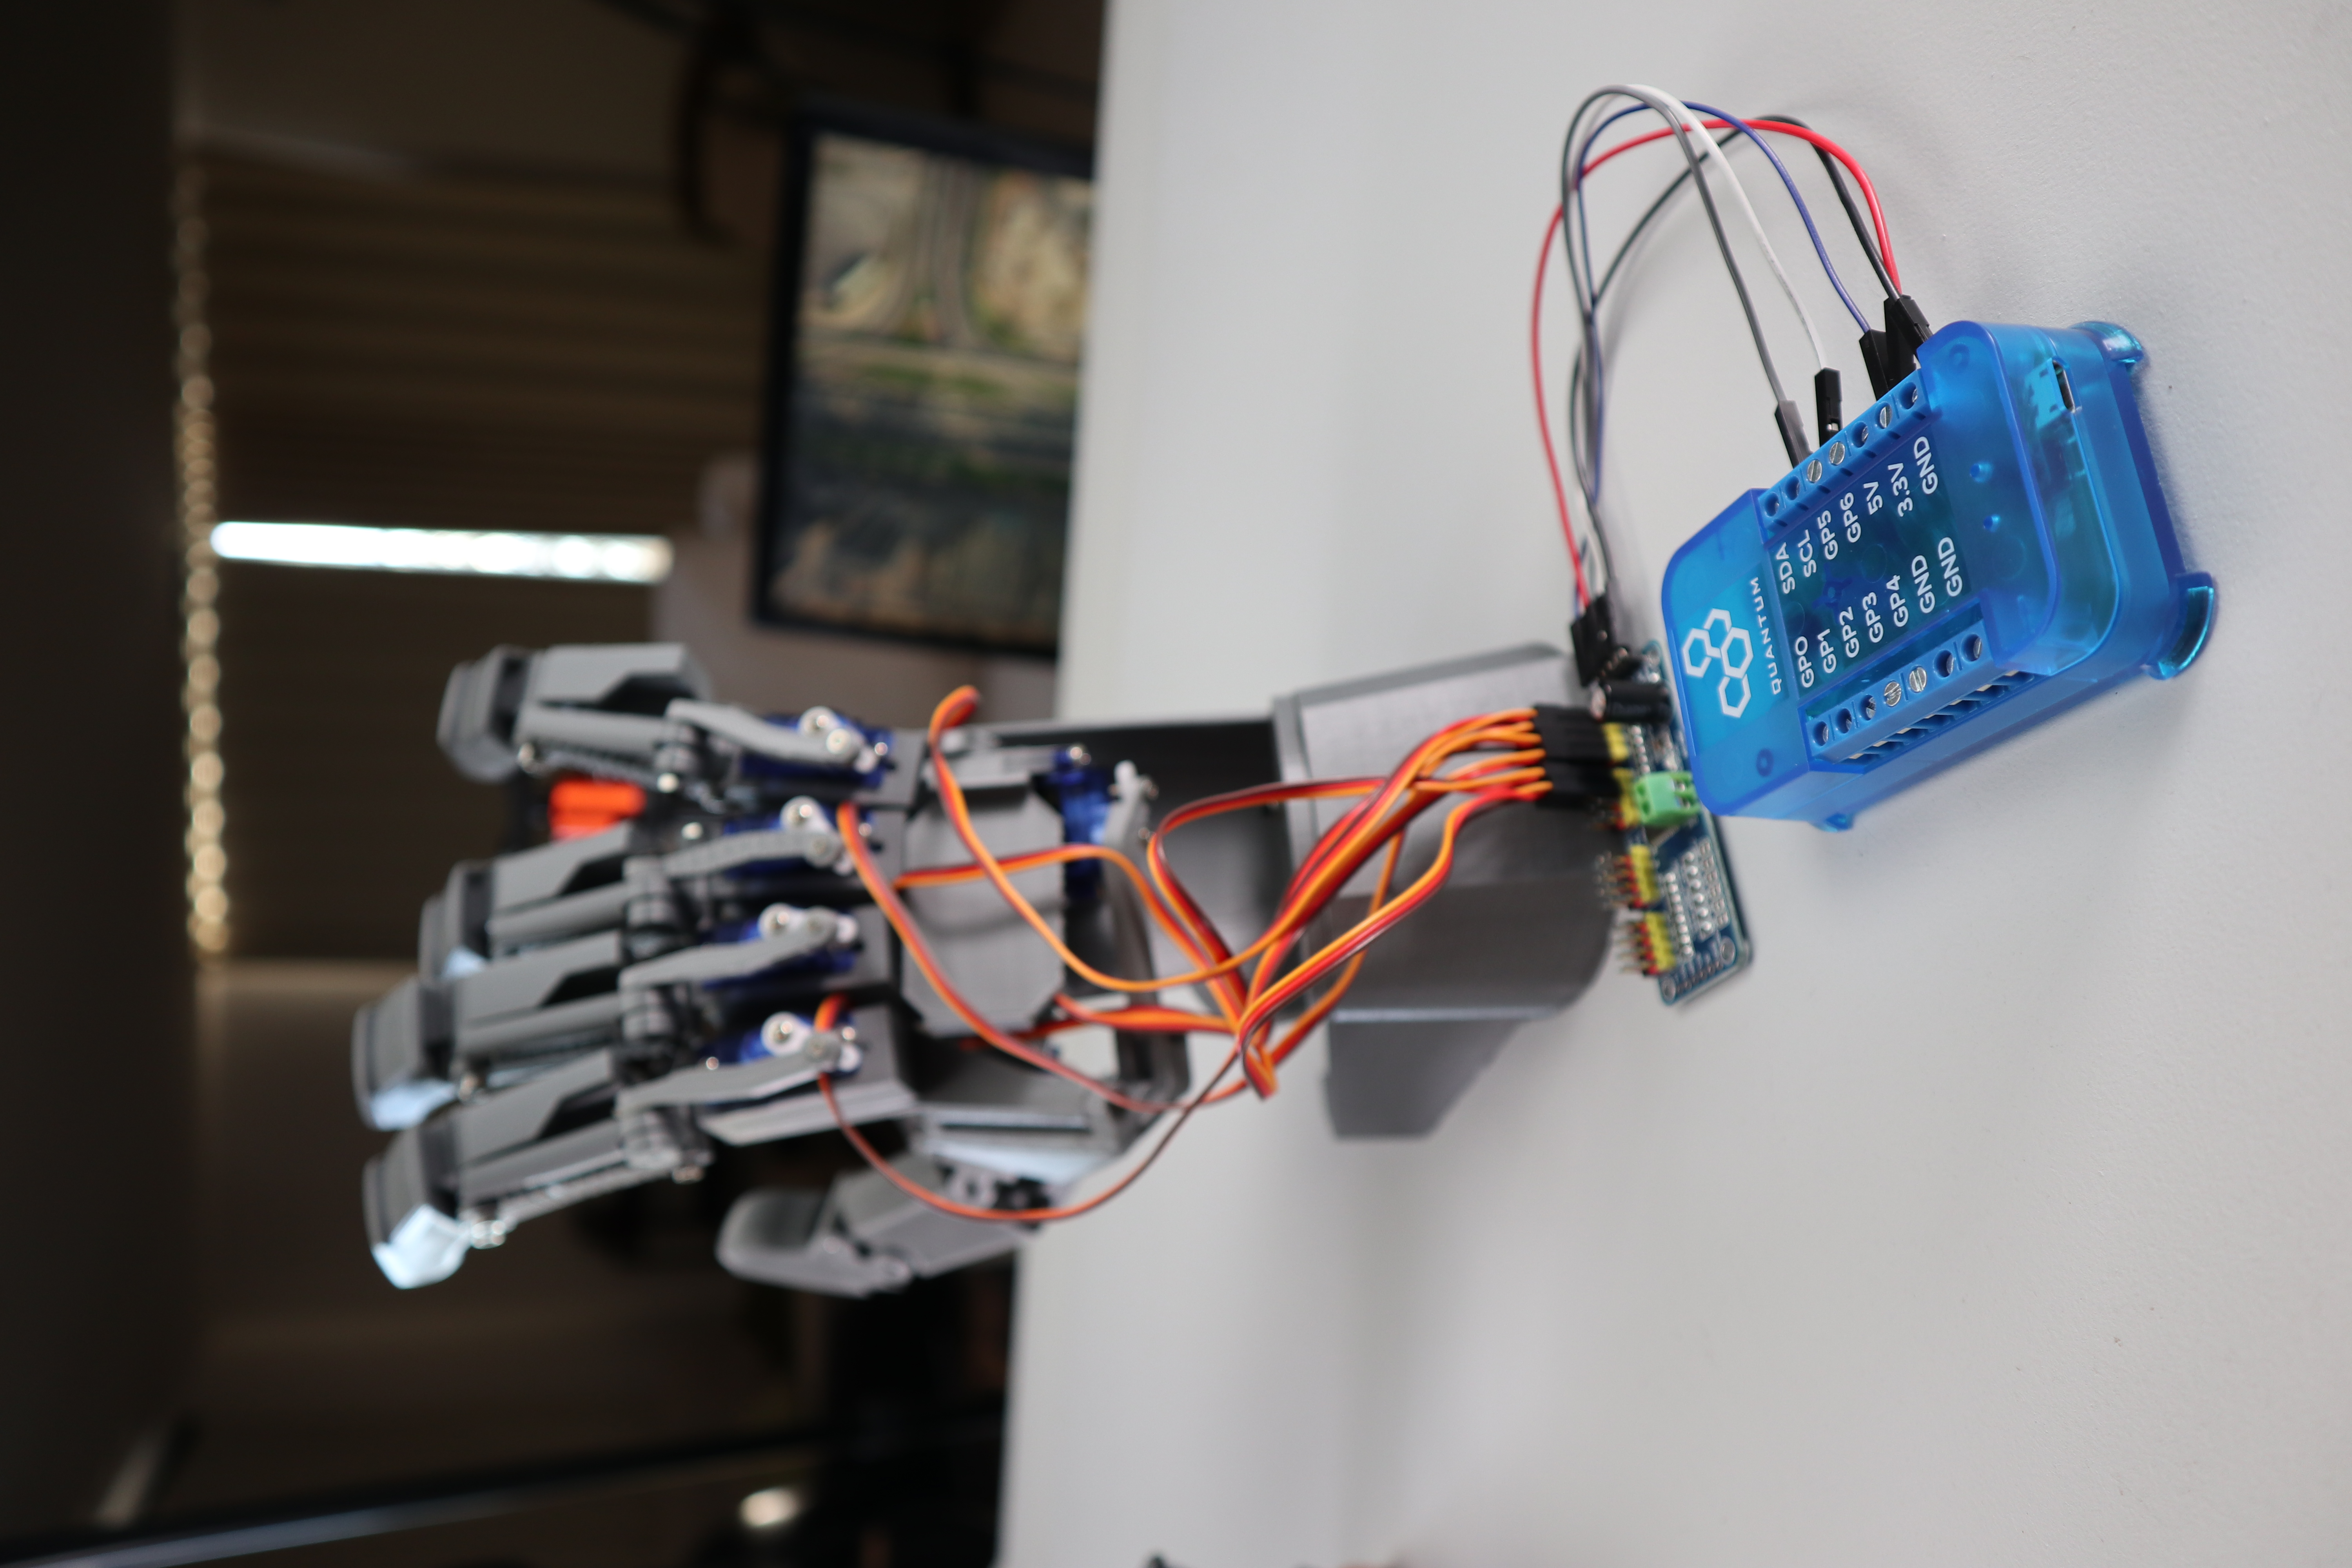
To wire the Robot and Exo hand servos and potentiometers to the Builder Bases follow the diagrams and schematics below.
To wire the Robot hand servos:
First Connect the the SDA,SCL, GND, 5V, and 3.3V ports to PCA9685 as shown.
Next, connect the PCA9685 to the servos as shown.
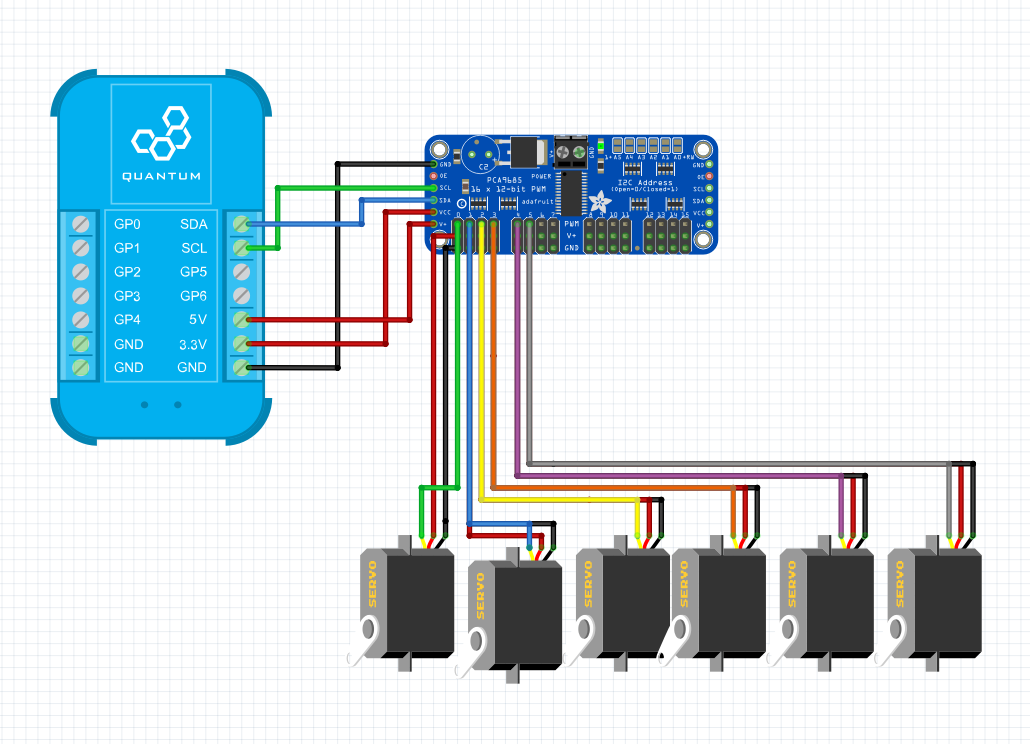
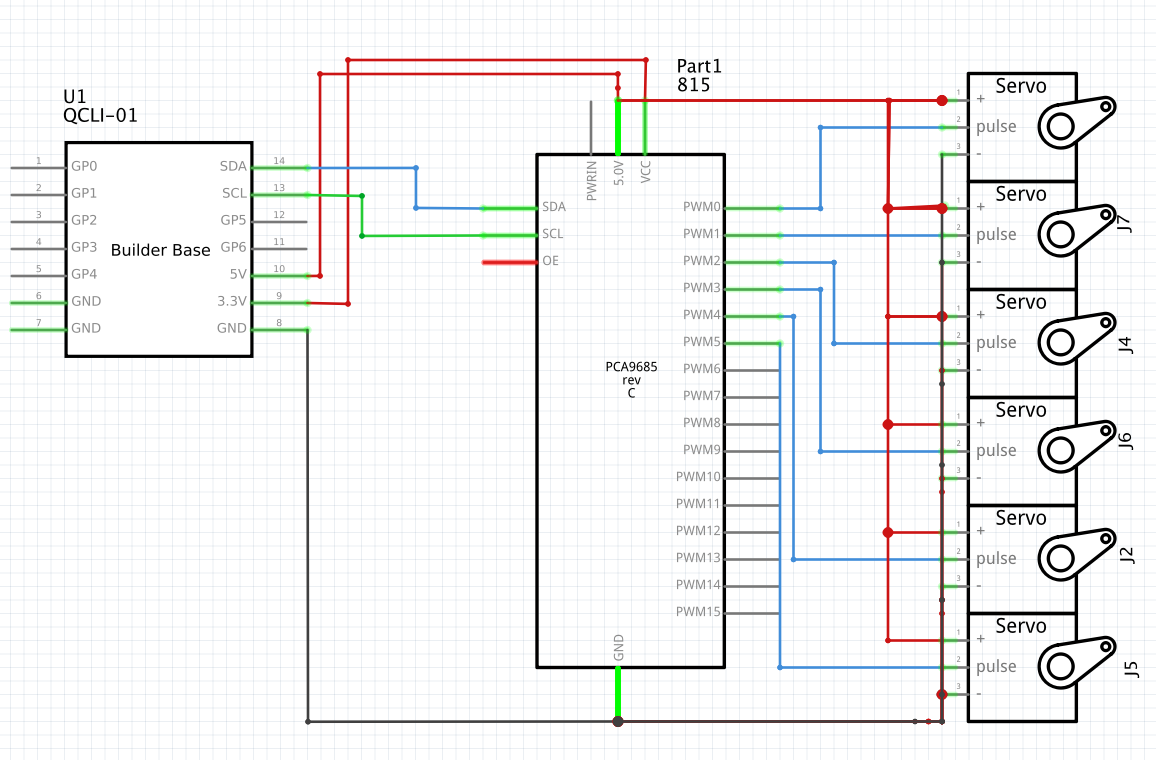
Finger Servo | Terminal |
|---|---|
Pinky | 0 |
Ring | 1 |
Middle | 2 |
Index | 3 |
Thumb Tip | 4 |
Thumb Base | 5 |
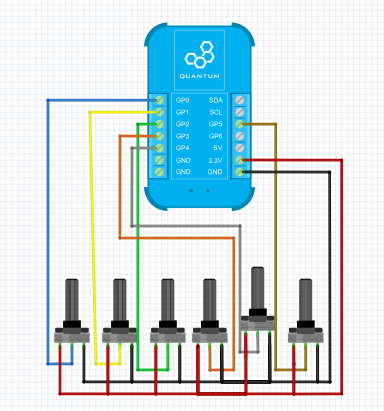
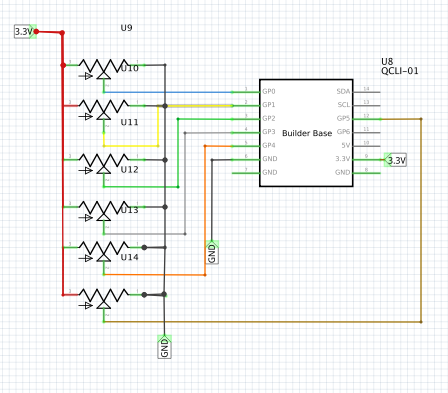
Now, wire the Exo-Hand potentiometers to the builder base as follows:
Step 2: Build the Firmware
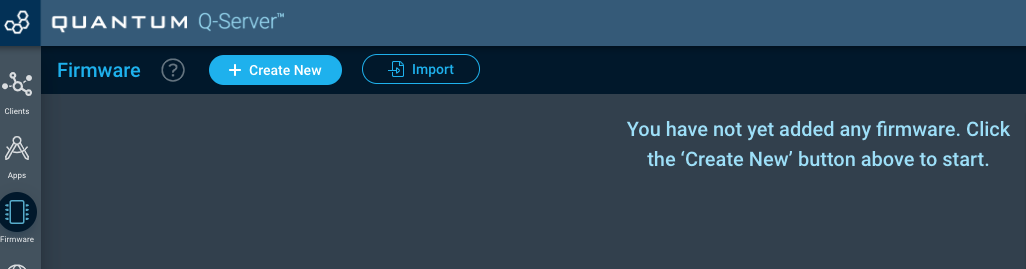
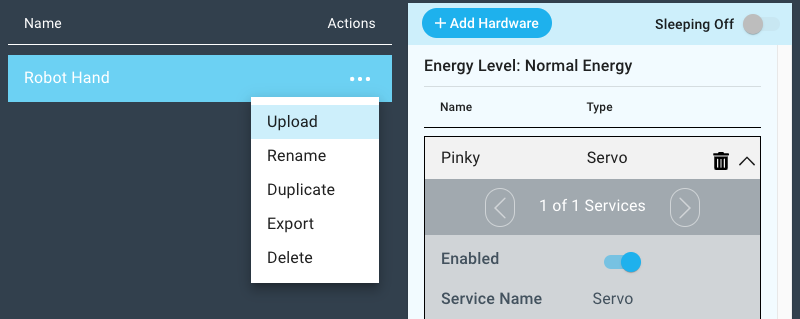
Navigate to the Firmware Builder and select the “+ Create New” button on the upper left hand side of the screen.
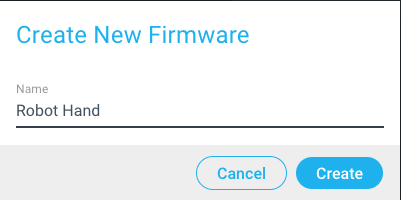
Name your firmware “Robot Hand” and hit create.
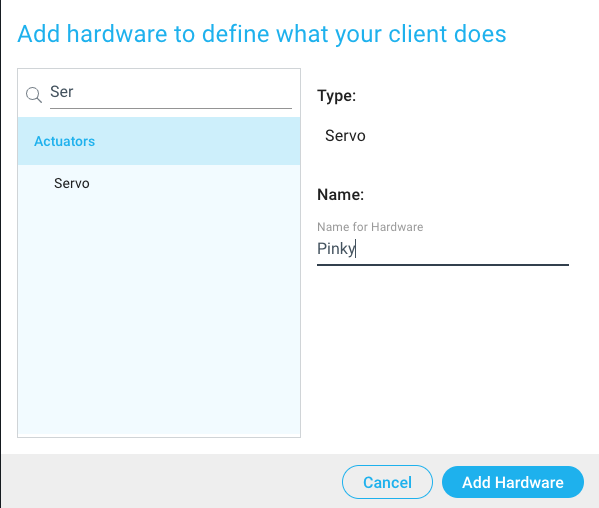
Now, select the “+ Add Hardware” button, add a Servo device to the firmware. Name the device Pinky, and hit the “Add Hardware” button.

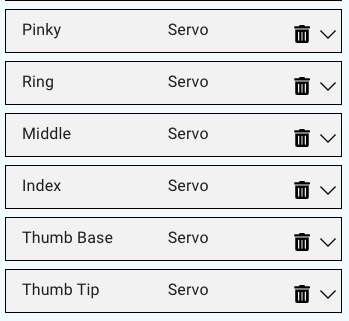
Repeat these steps for five more servos, naming them: Ring, Middle, Index, Thumb Tip, and Thumb Base.
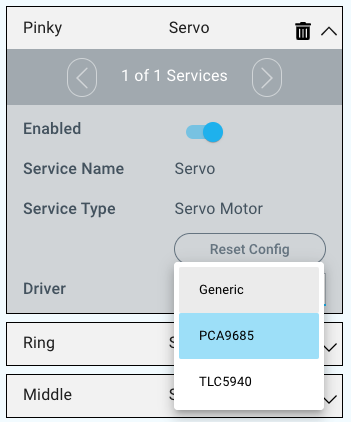
Select the Pinky device in your firmware to expand the configuration options.
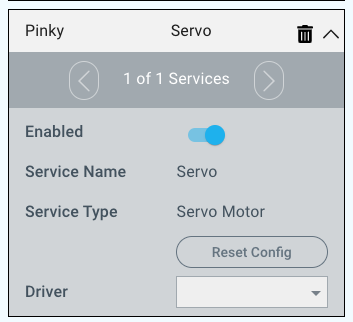
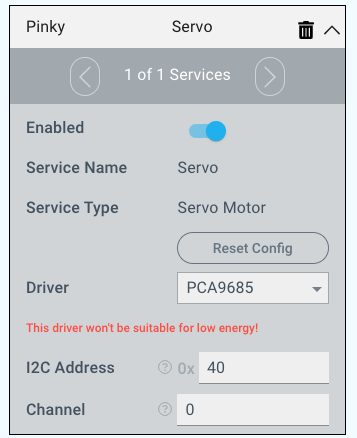
Select the PCA9685 from the driver drop down menu and configure it as follows:
Repeat the above steps for the remaining devices and configure them according to the table below. Exclude the pinky if you have already added it to your firmware file.
Device | I2C Address | Channel |
|---|---|---|
Pinky | 0x40 | 0 |
Ring | 0x40 | 1 |
Middle | 0x40 | 2 |
Index | 0x40 | 3 |
Thumb Base | 0x40 | 4 |
Thumb Tip | 0x40 | 5 |
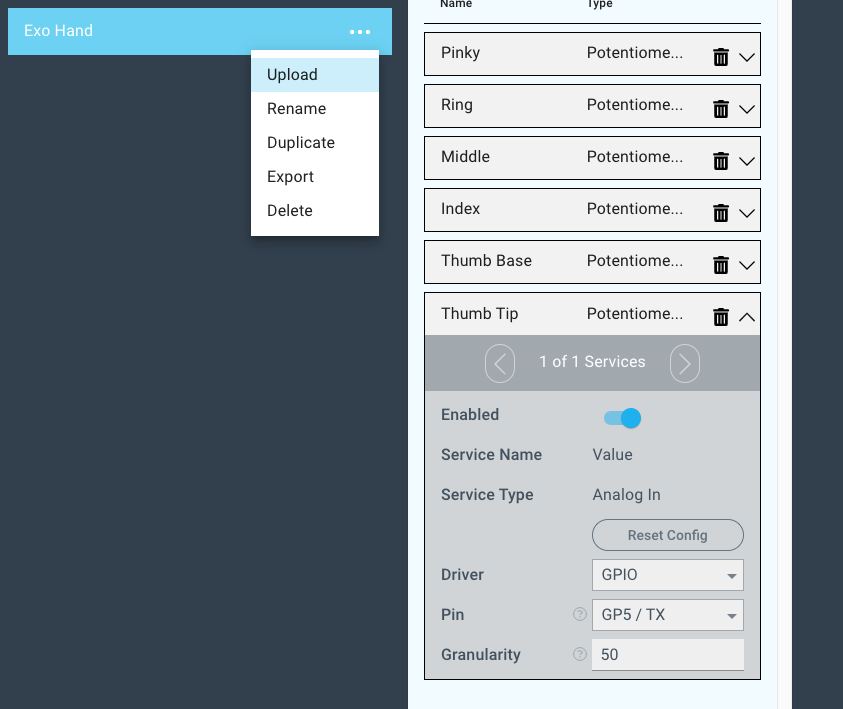
Once you have completed configuring your devices, save your firmware file and upload it to the Client wired to your robot hand!

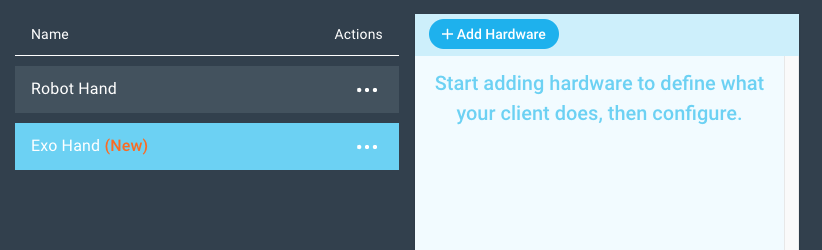
Next, we will build the firmware for your ExoHand.
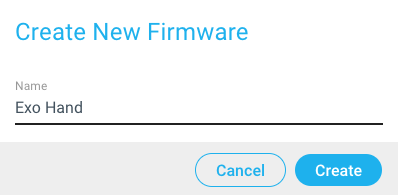
Navigate to the Firmware Builder and select the “+ Create New” button on the upper left hand side of the screen.
Name your firmware “Exo Hand” and hit create.
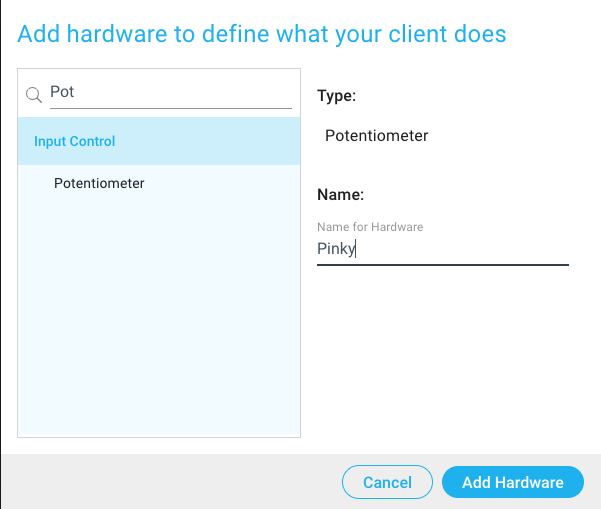
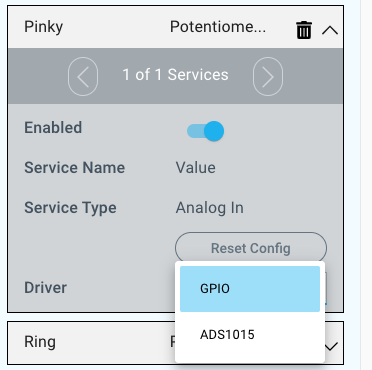
Now, select the “+ Add Hardware” button, add a Potentiometer device to the firmware. Name the device Pinky, and hit the “Add Hardware” button.
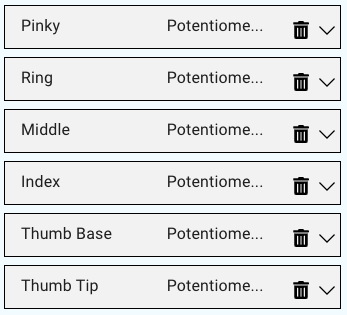
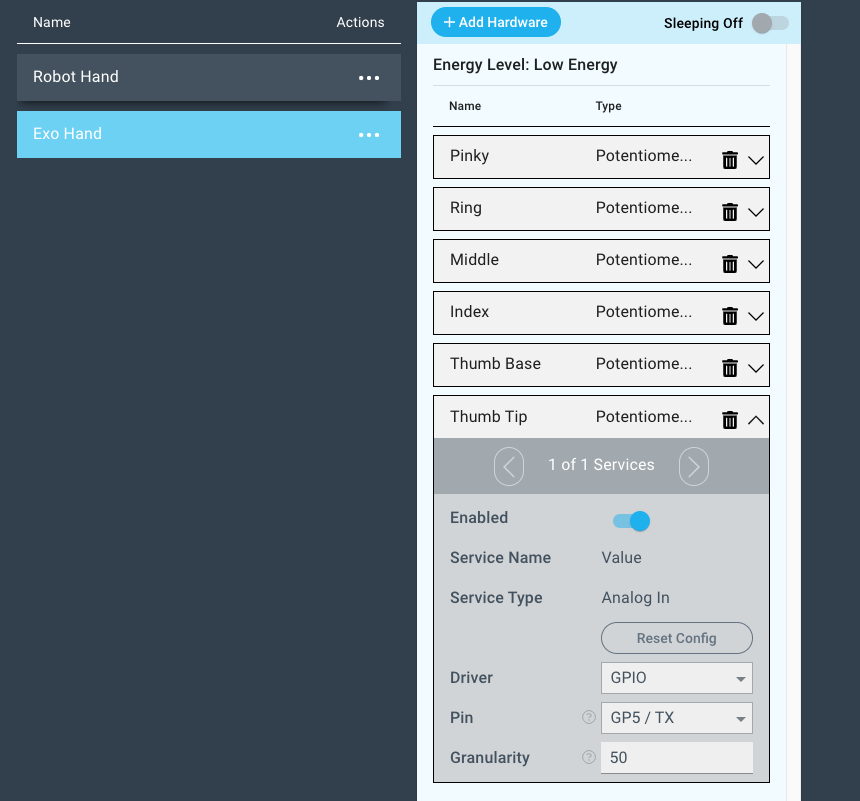
Repeat these steps for five more potentiometers, naming them: Ring, Middle, Index, Thumb Tip, and Thumb Base.
Select the Pinky device in your firmware to expand the configuration options.
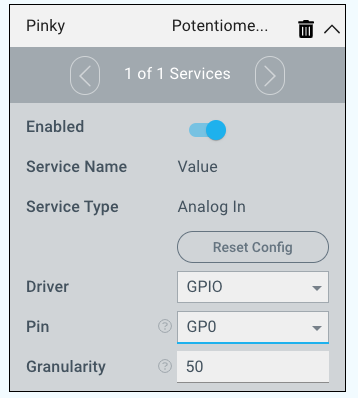
Select the PCA9865 from the driver drop down menu and configure it as follows:
Repeat the above steps for the remaining devices and configure them according to the table below.
Device | Pin |
|---|---|
Pinky | GP0 |
Ring | GP1 |
Middle | GP2 |
Index | GP3 |
Thumb Base | GP4 |
Thumb Tip | GP5 |
Once you have completed configuring your devices, save your firmware file and upload it to the Client wired to your Exo hand!
Step 3: Obtain Potentiometer Range
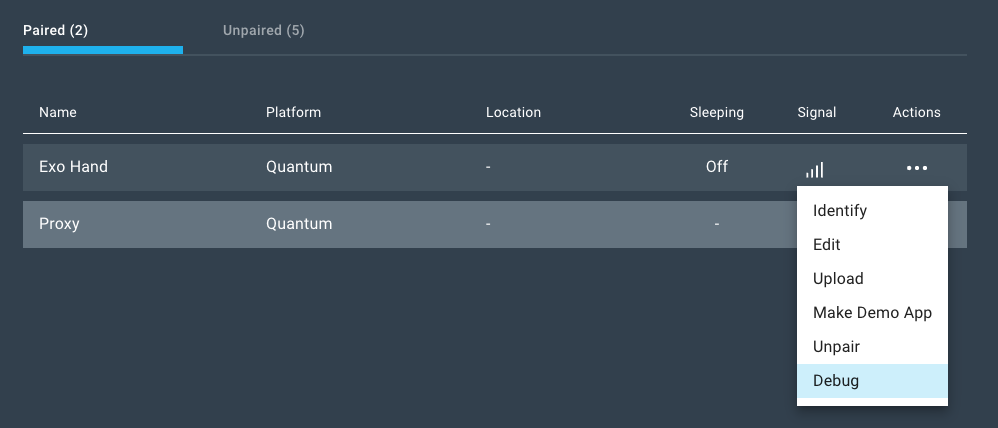
After the firmware upload for the Exo Hand is complete, navigate to the clients page on your server.
Select the Debug action from the Actions dropdown menu.
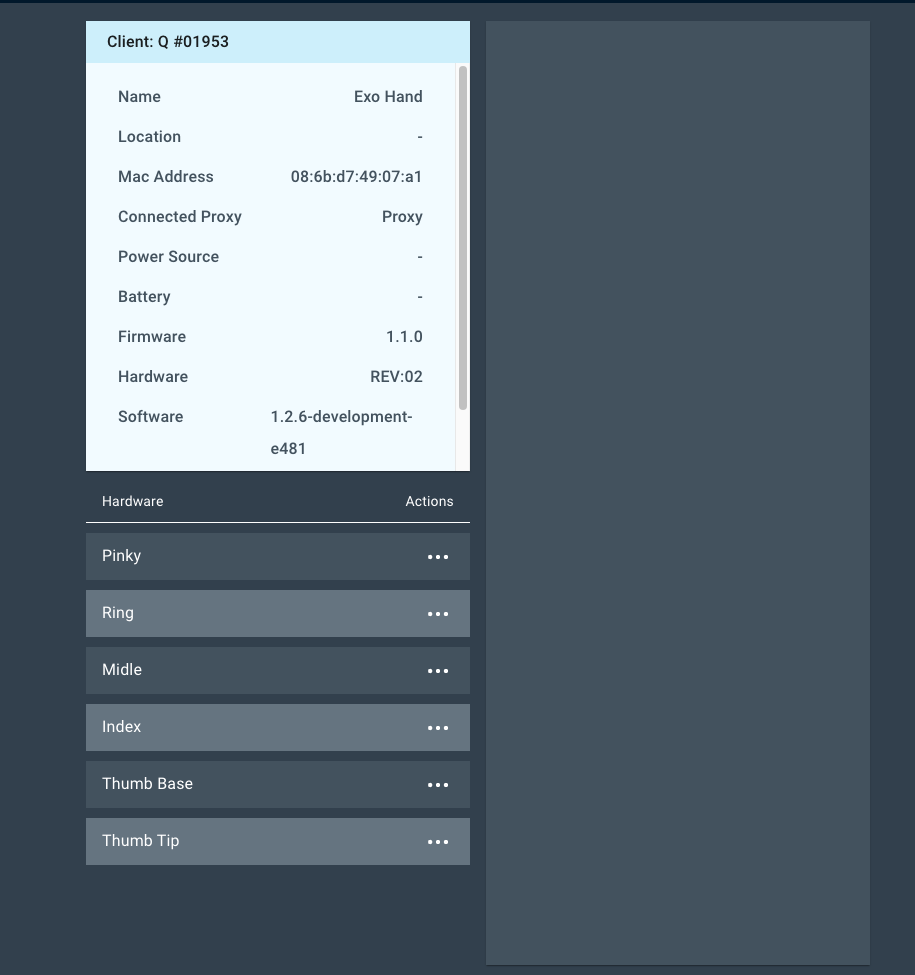
Once here you will read the potentiometer readings for each finger in their retracted and extended positions.
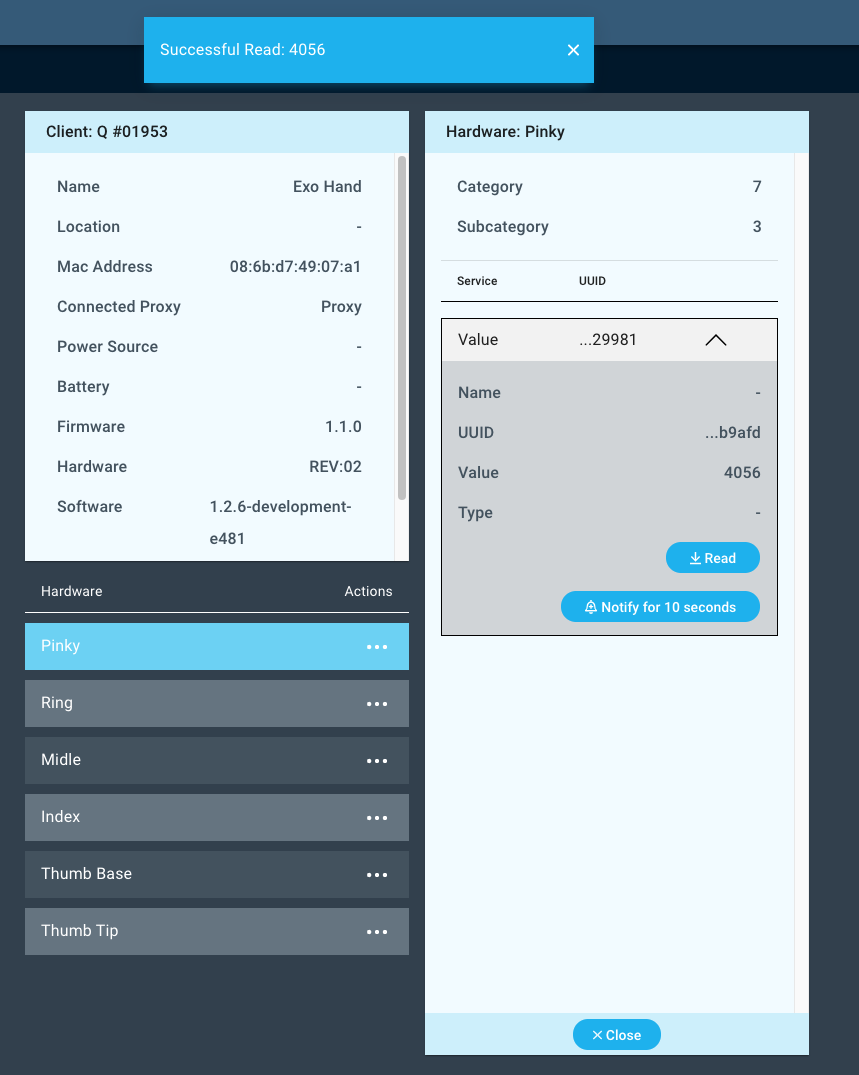
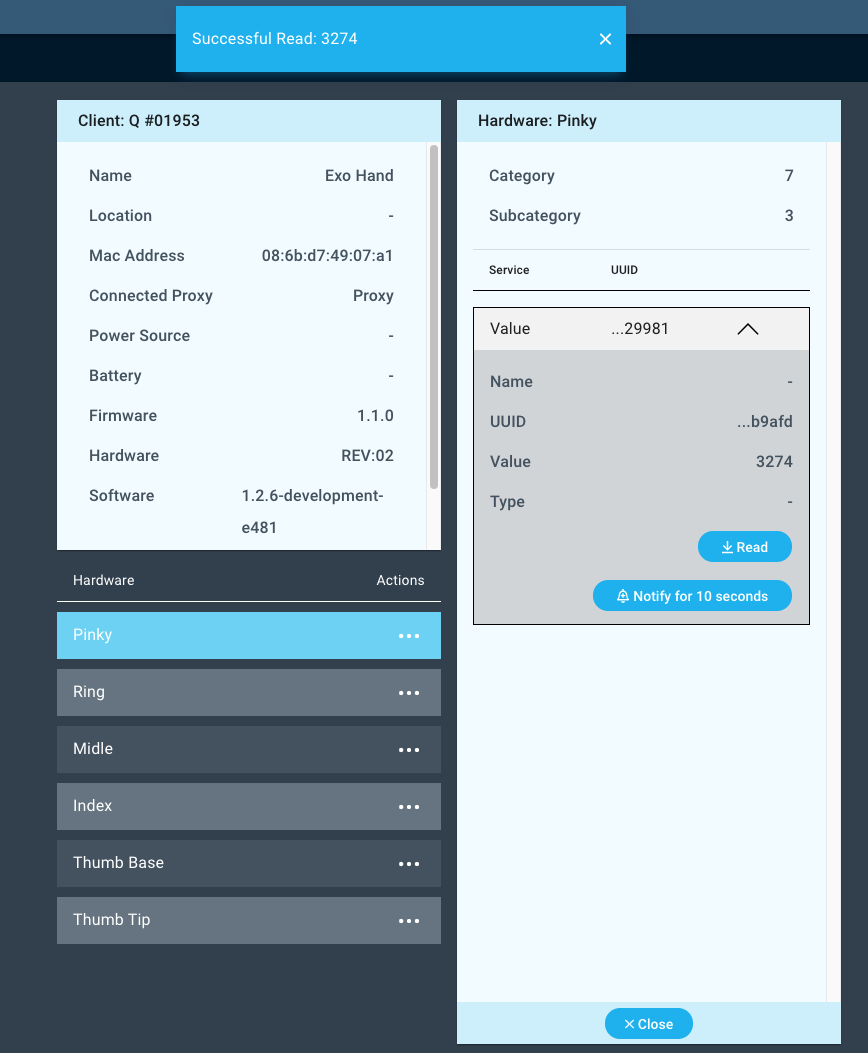
Record the analog values for each finger in both positions. We will use these values in the next step while building the application.
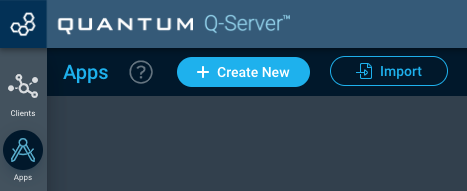
Step 4: Build the Application
To build the application you will need to navigate to your application page and select the “+ Create New” button.
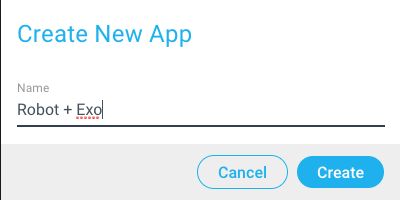
Now, name your application and press the “Create” button. We named ours Robot + Exo.
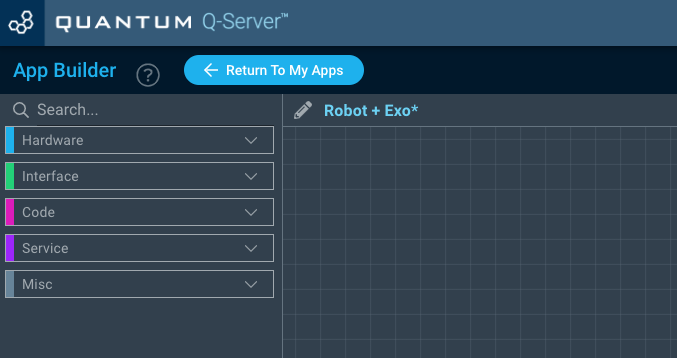
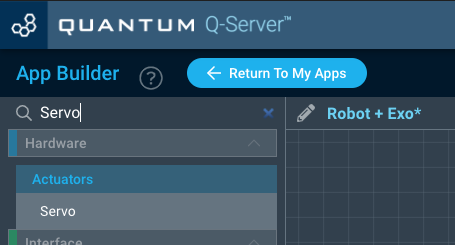
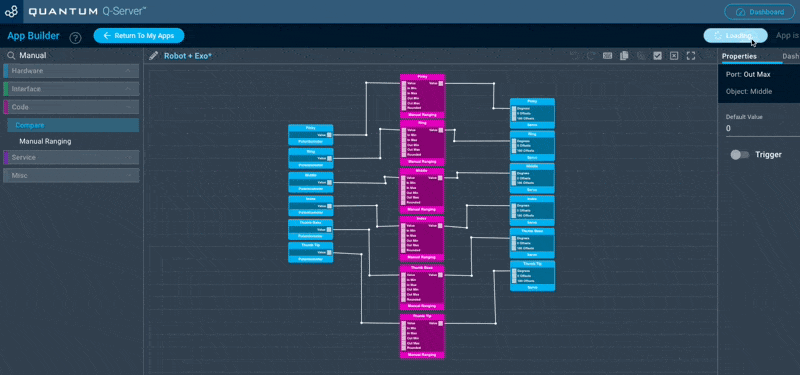
You should now be on the app builder canvas. Using the search bar in the upper left hand corner of the canvas, find the Potentiometer hardware object and drag 6 of them onto the canvas.
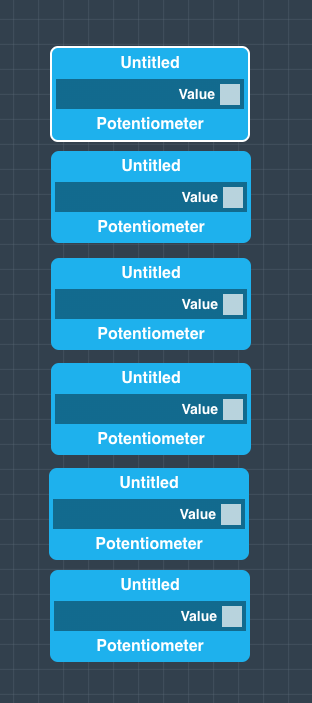
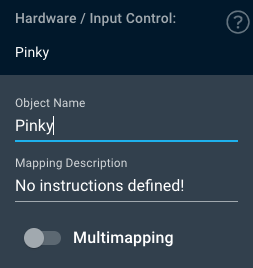
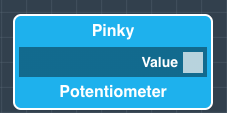
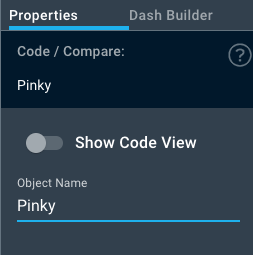
Select the top Potentiometer object, and navigate over to the properties panel on the right side of the screen. Change the name of the object from “Untitled” to “Pinky”, and then click the “Save Properties” button below.

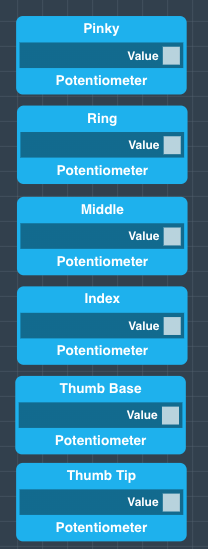
Follow the same steps for the remaining Potentiometer objects, naming them as shown
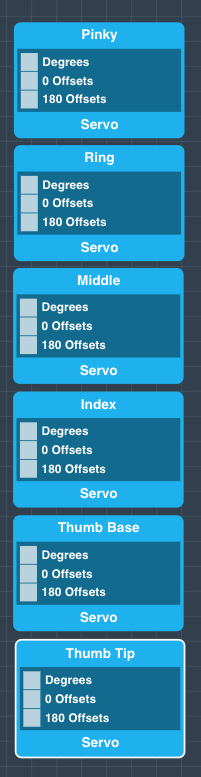
Next, search for the Servo hardware object and drag six of them onto the canvas.
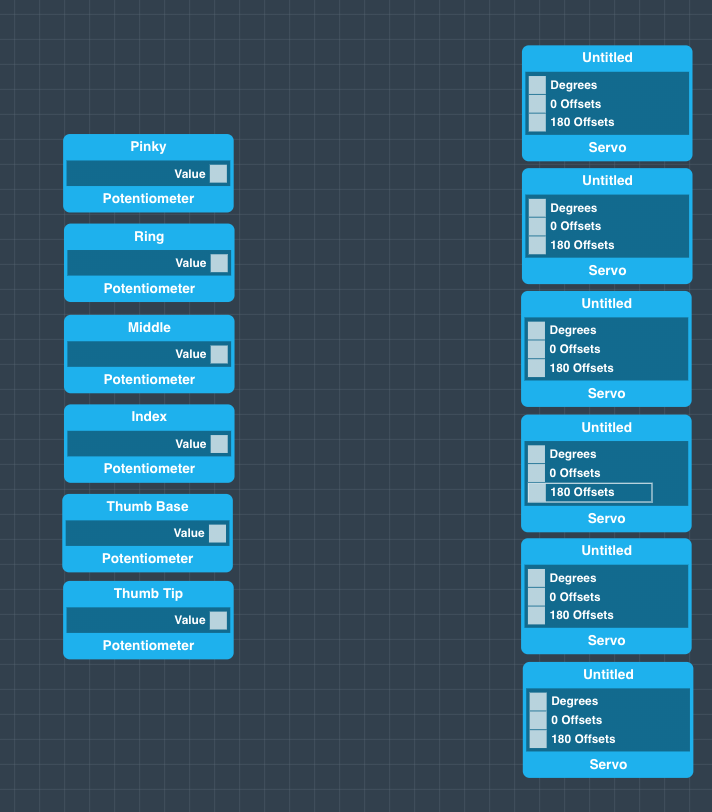
Follow the same steps and ordering found above to name the servo objects.

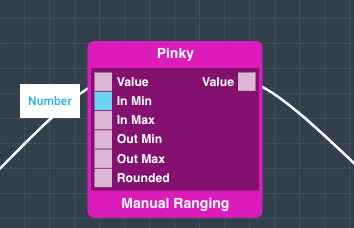
Again, using the search bar find the “Manual Ranging” code object and drag six of them onto the canvas.
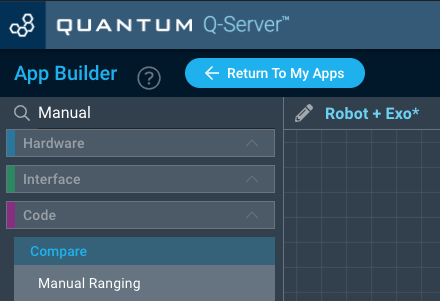
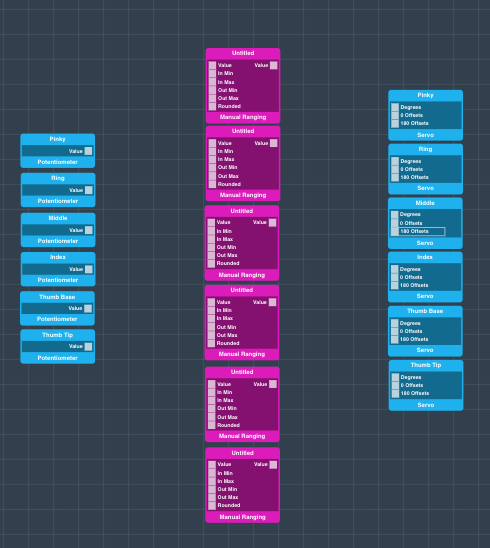
Follow the same steps and ordering found above to name the Manual Ranging objects.
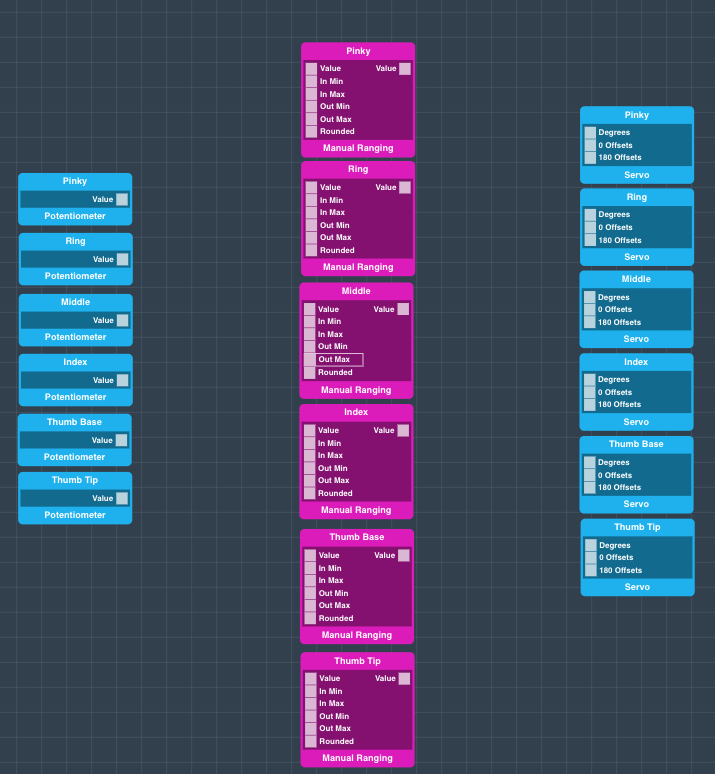
Next, connect the Potentiometer Value port to the Manual Ranging Value in port as shown.
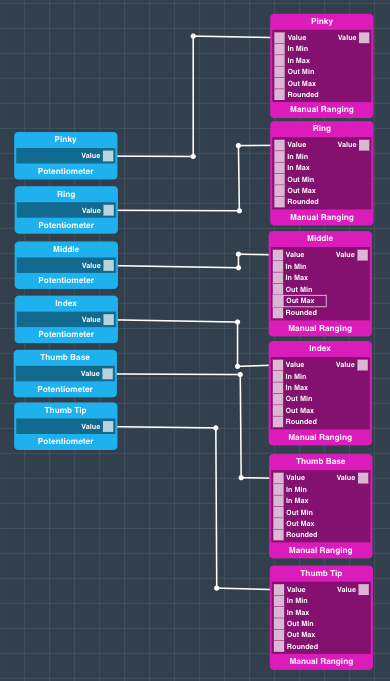
And the Manual Ranging Value out port to the Servo Degrees port as shown.

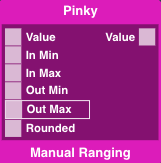
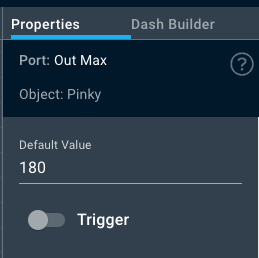
Now, we will set the Out Max for each of Manual Ranging objects to 180. To set the value click on the Out Max port, navigate to the properties panel, change the default value to 180, and save. Do this for all manual ranging objects except for the Thumb Tip, we will keep this one set to 0.
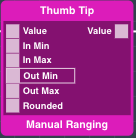
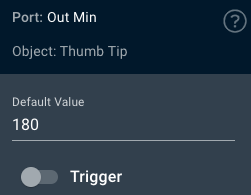
Now, for the Thumb Base Manual Ranging object we will set the port to 180. We configure the Max/Min out ports on this object opposite the other Manual ranging objets, because the thumb base servo needs to rotate in the opposite direction of the other servos.
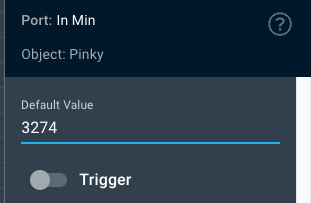
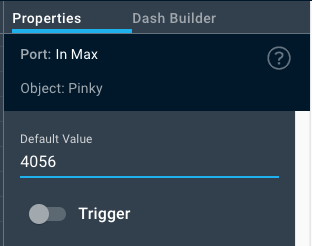
Now we will set the In Min and In Max values for each of the manual ranging objects. The analog values for the extended position will be used for the In Min Value and the and values for the retracted position will be used for the In Max values.
We will show you how to do it for the pinky, but you will need to do the rest on your own.
Select the In Min Port on the Pinky manual ranging object, input your extended position analog value in the properties panel, and then save.
Now select the In Max port on the same code object, input your retracted position analog value, and then save.
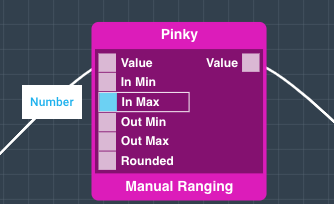
Now, repeat these steps for all of the five remaining manual ranging code objects. Make sure to use the right analog values for each object, meaning use the analog values for the ring potentiometer with the Ring manual ranging code object.
Lastly, save your application!
Step 5: Map the Application
Navigate back to your applications page and hit the start button next to your Robot + Exo application.

A list of the devices contained in your application will expand.
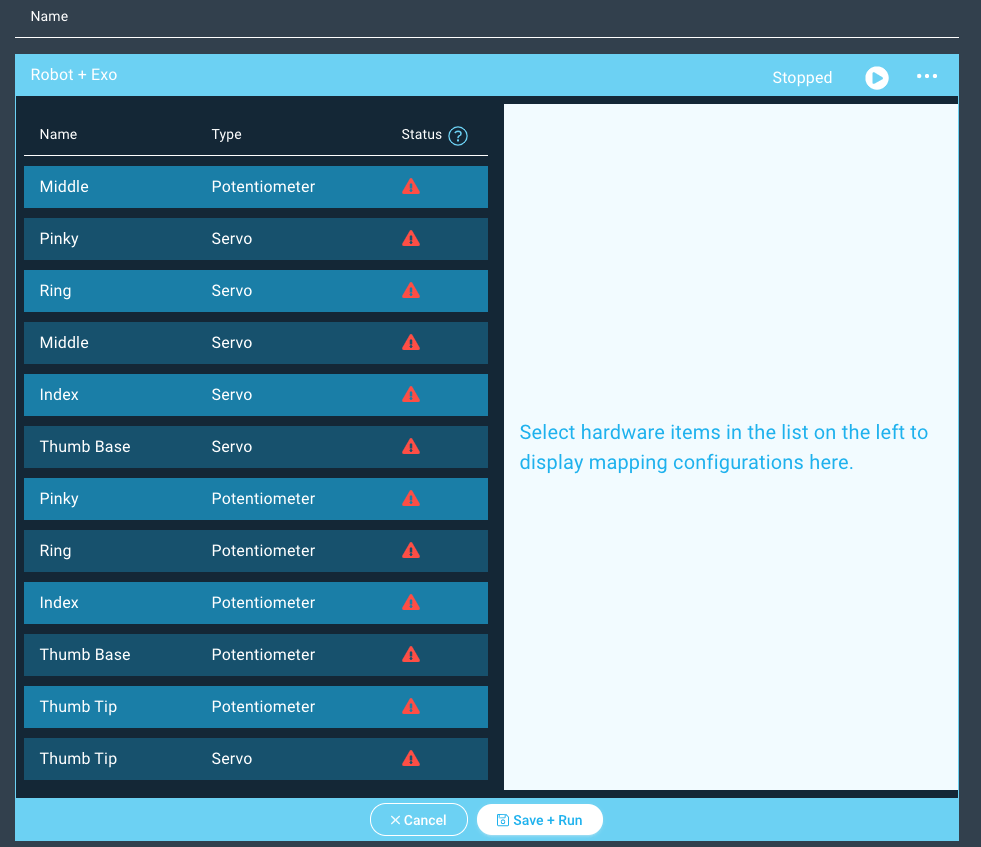
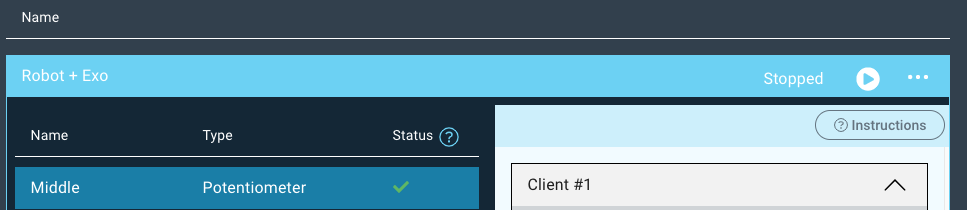
Now, select the Middle object and map the Middle driver to it.
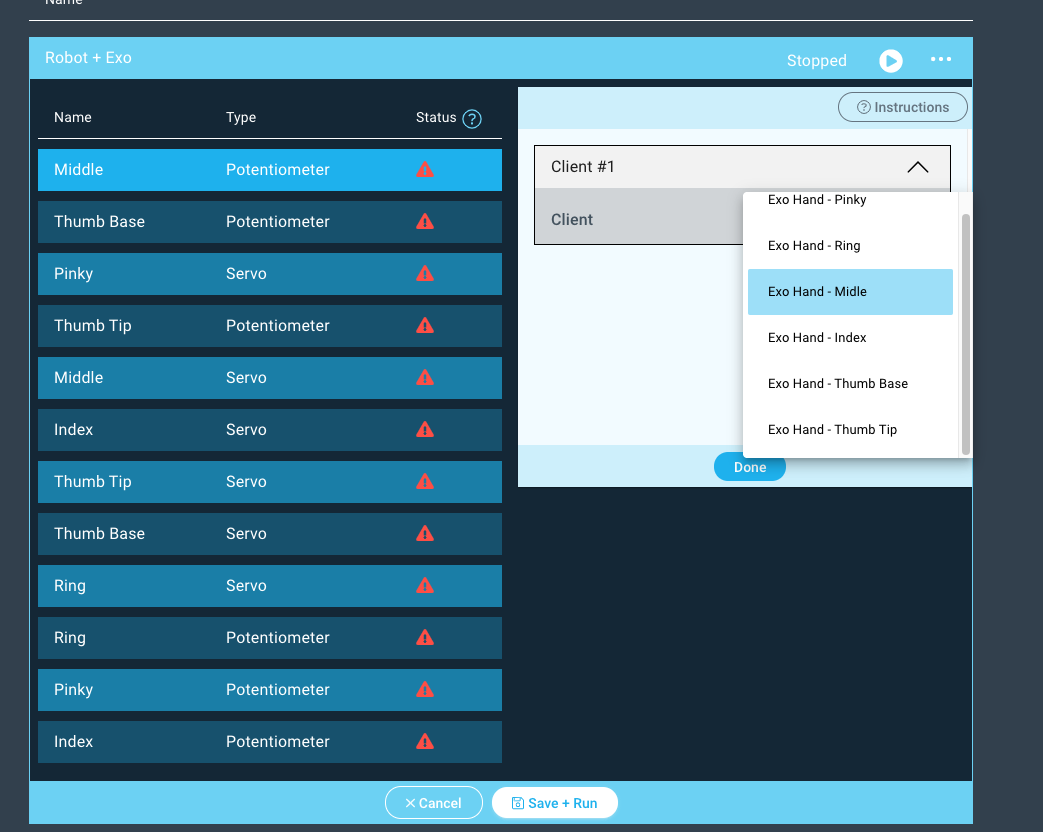
Now go through the rest of the objects and map them to their corresponding drivers. For example, Ring Potentiometer → Ring, and Pinky Servo → Pinky.
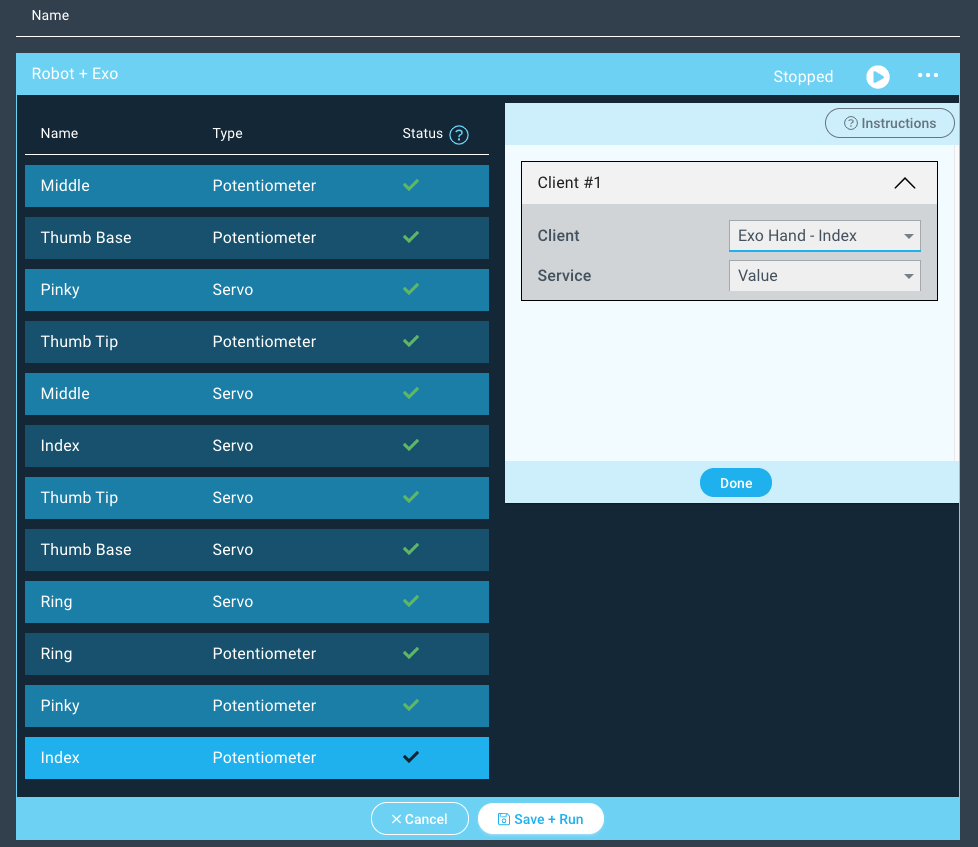
Once you’ve mapped all of the drivers to the objects it is time to run the application.
Step 6: Run the Application!
Hit “Save + Run” and your application will start!

Step 7: Use your Robot and Exo Hands!
Now, when you move the fingers on your Exo Hands the corresponding finger on your robot hand should move. Enjoy!
Fritzing & Schematic
| View file | ||
|---|---|---|
|
Resources
3D Files | |||||||||
|---|---|---|---|---|---|---|---|---|---|
Application |
| ||||||||
Firmware |
| ||||||||
Fritzing |
| ||||||||
Schematic | |